Control popups with an Arduino
To control the popups I followed this instruction. After I got it to work with the script that can be found in this instruction I changed it so that the lights can be controlled via the serial monitor.
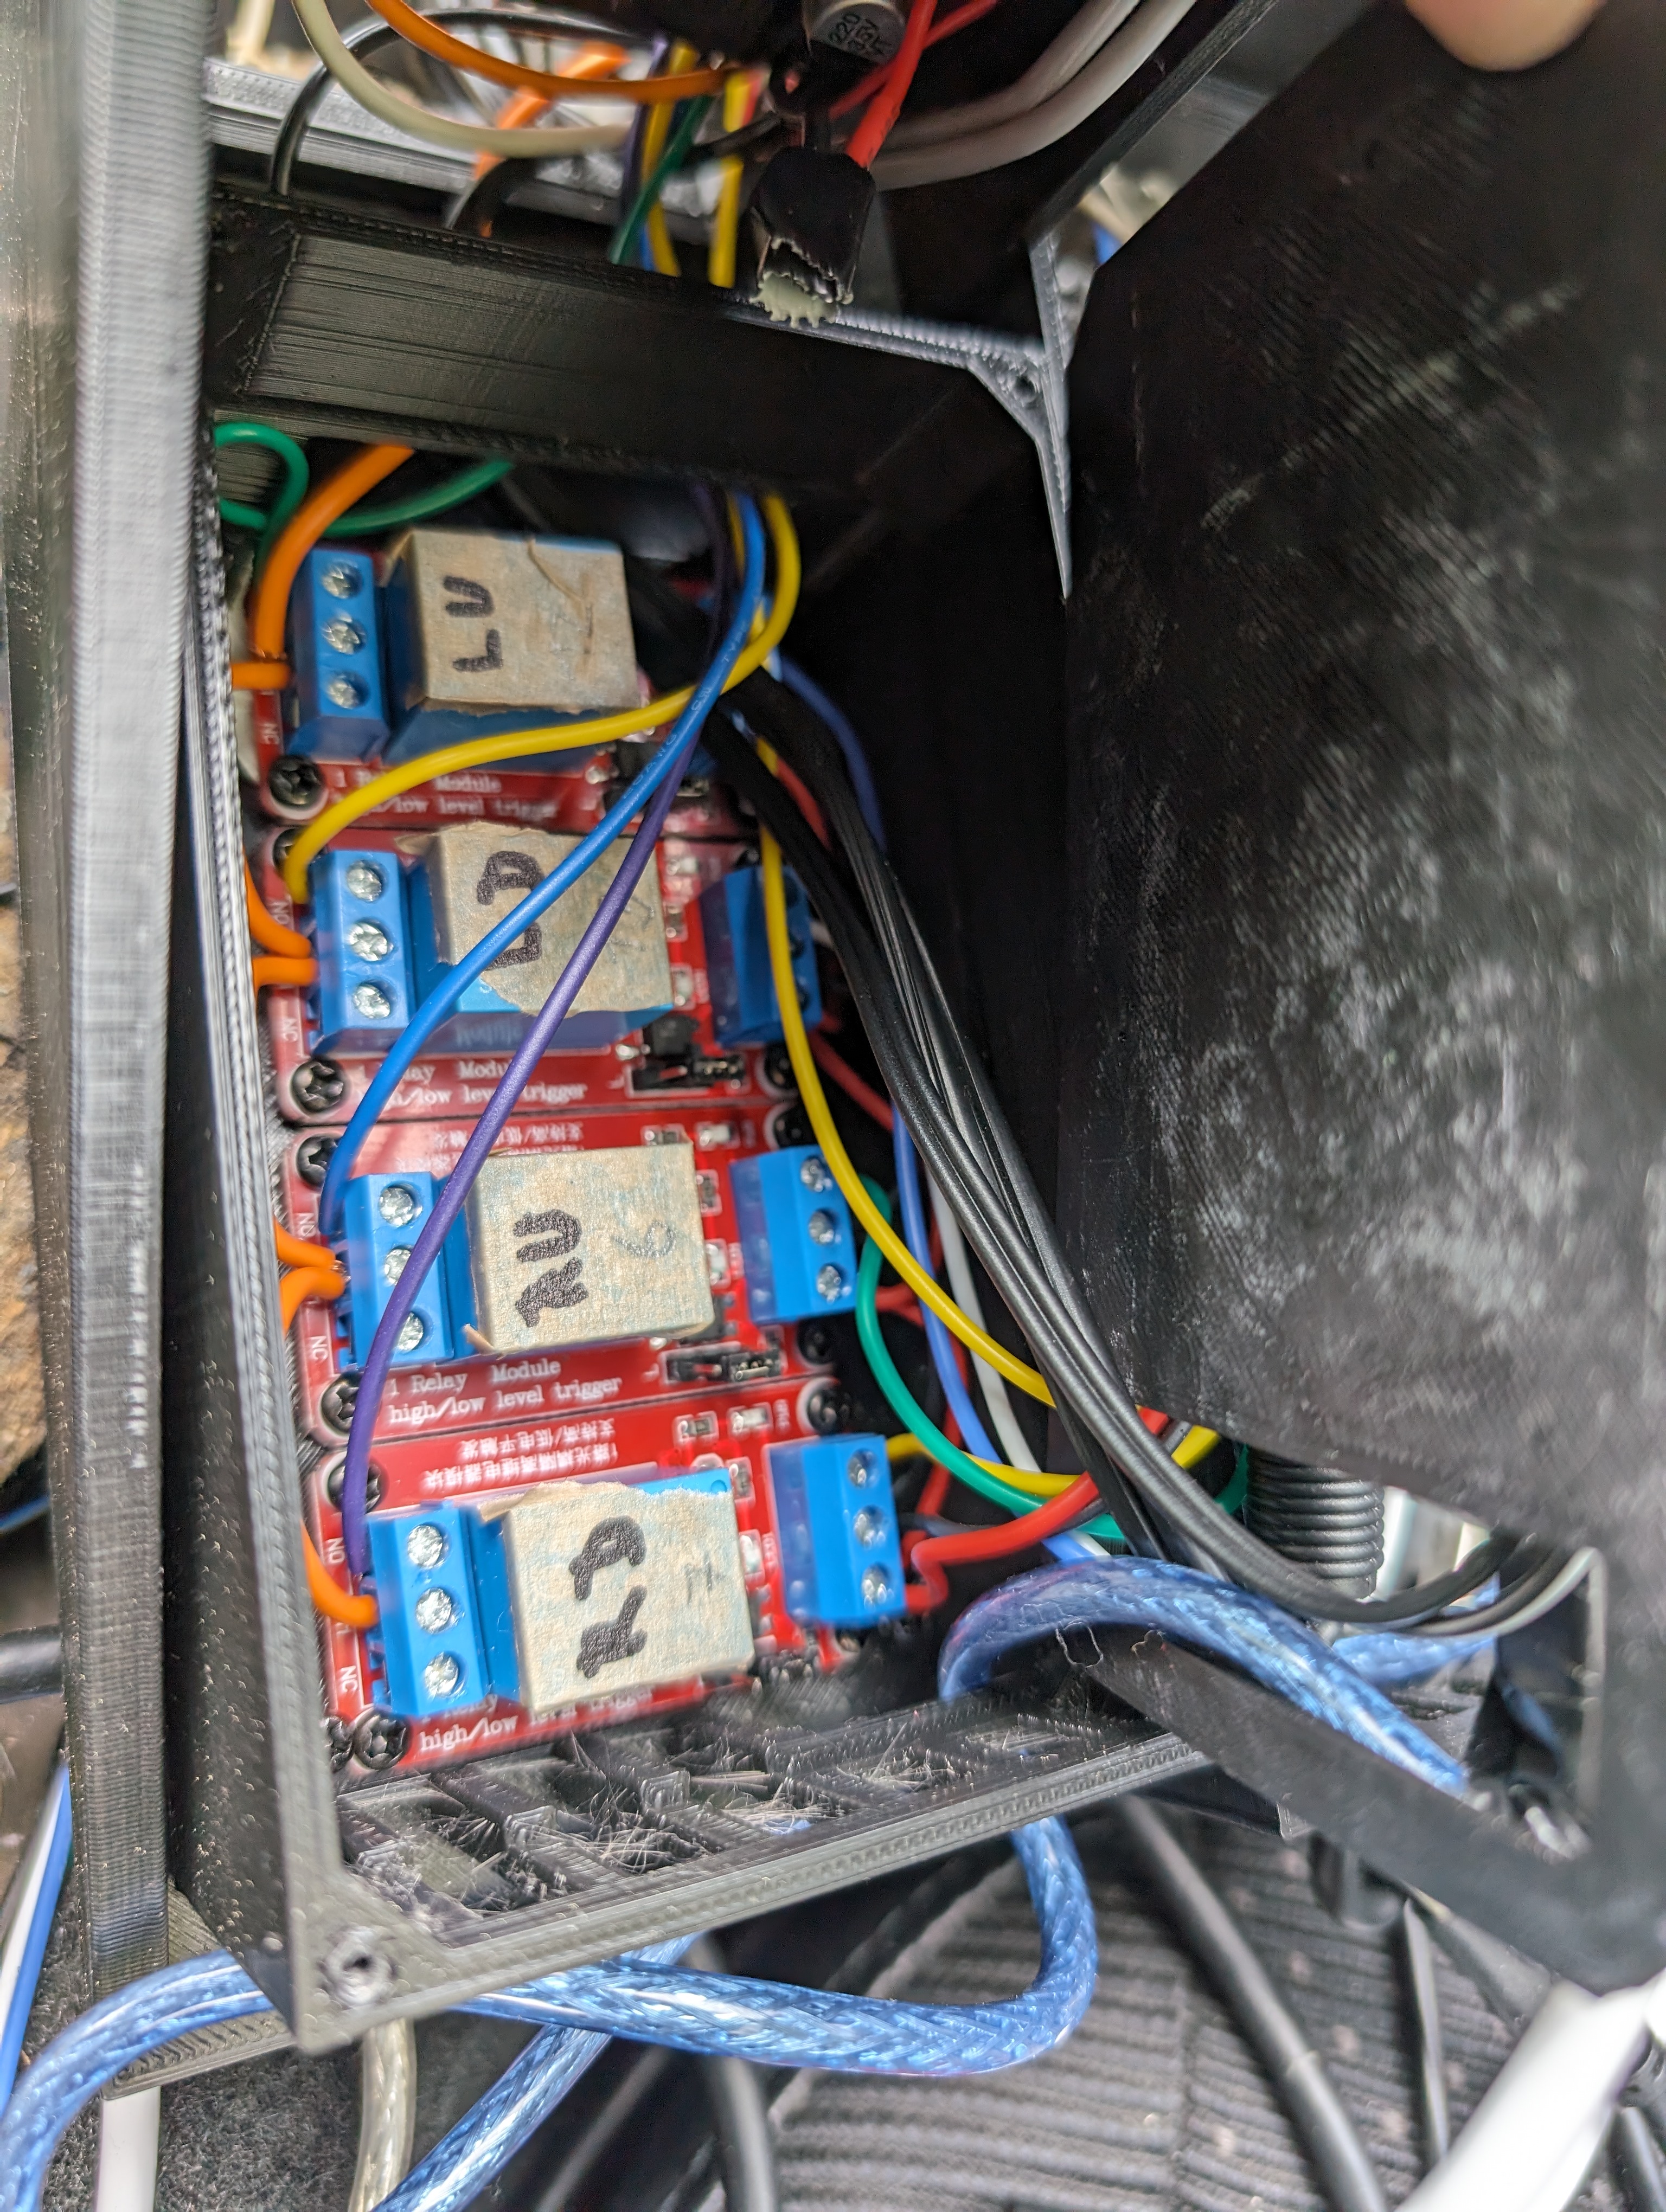
If you want to use my 3D models for the casing use these relays or some with the same dimensions.
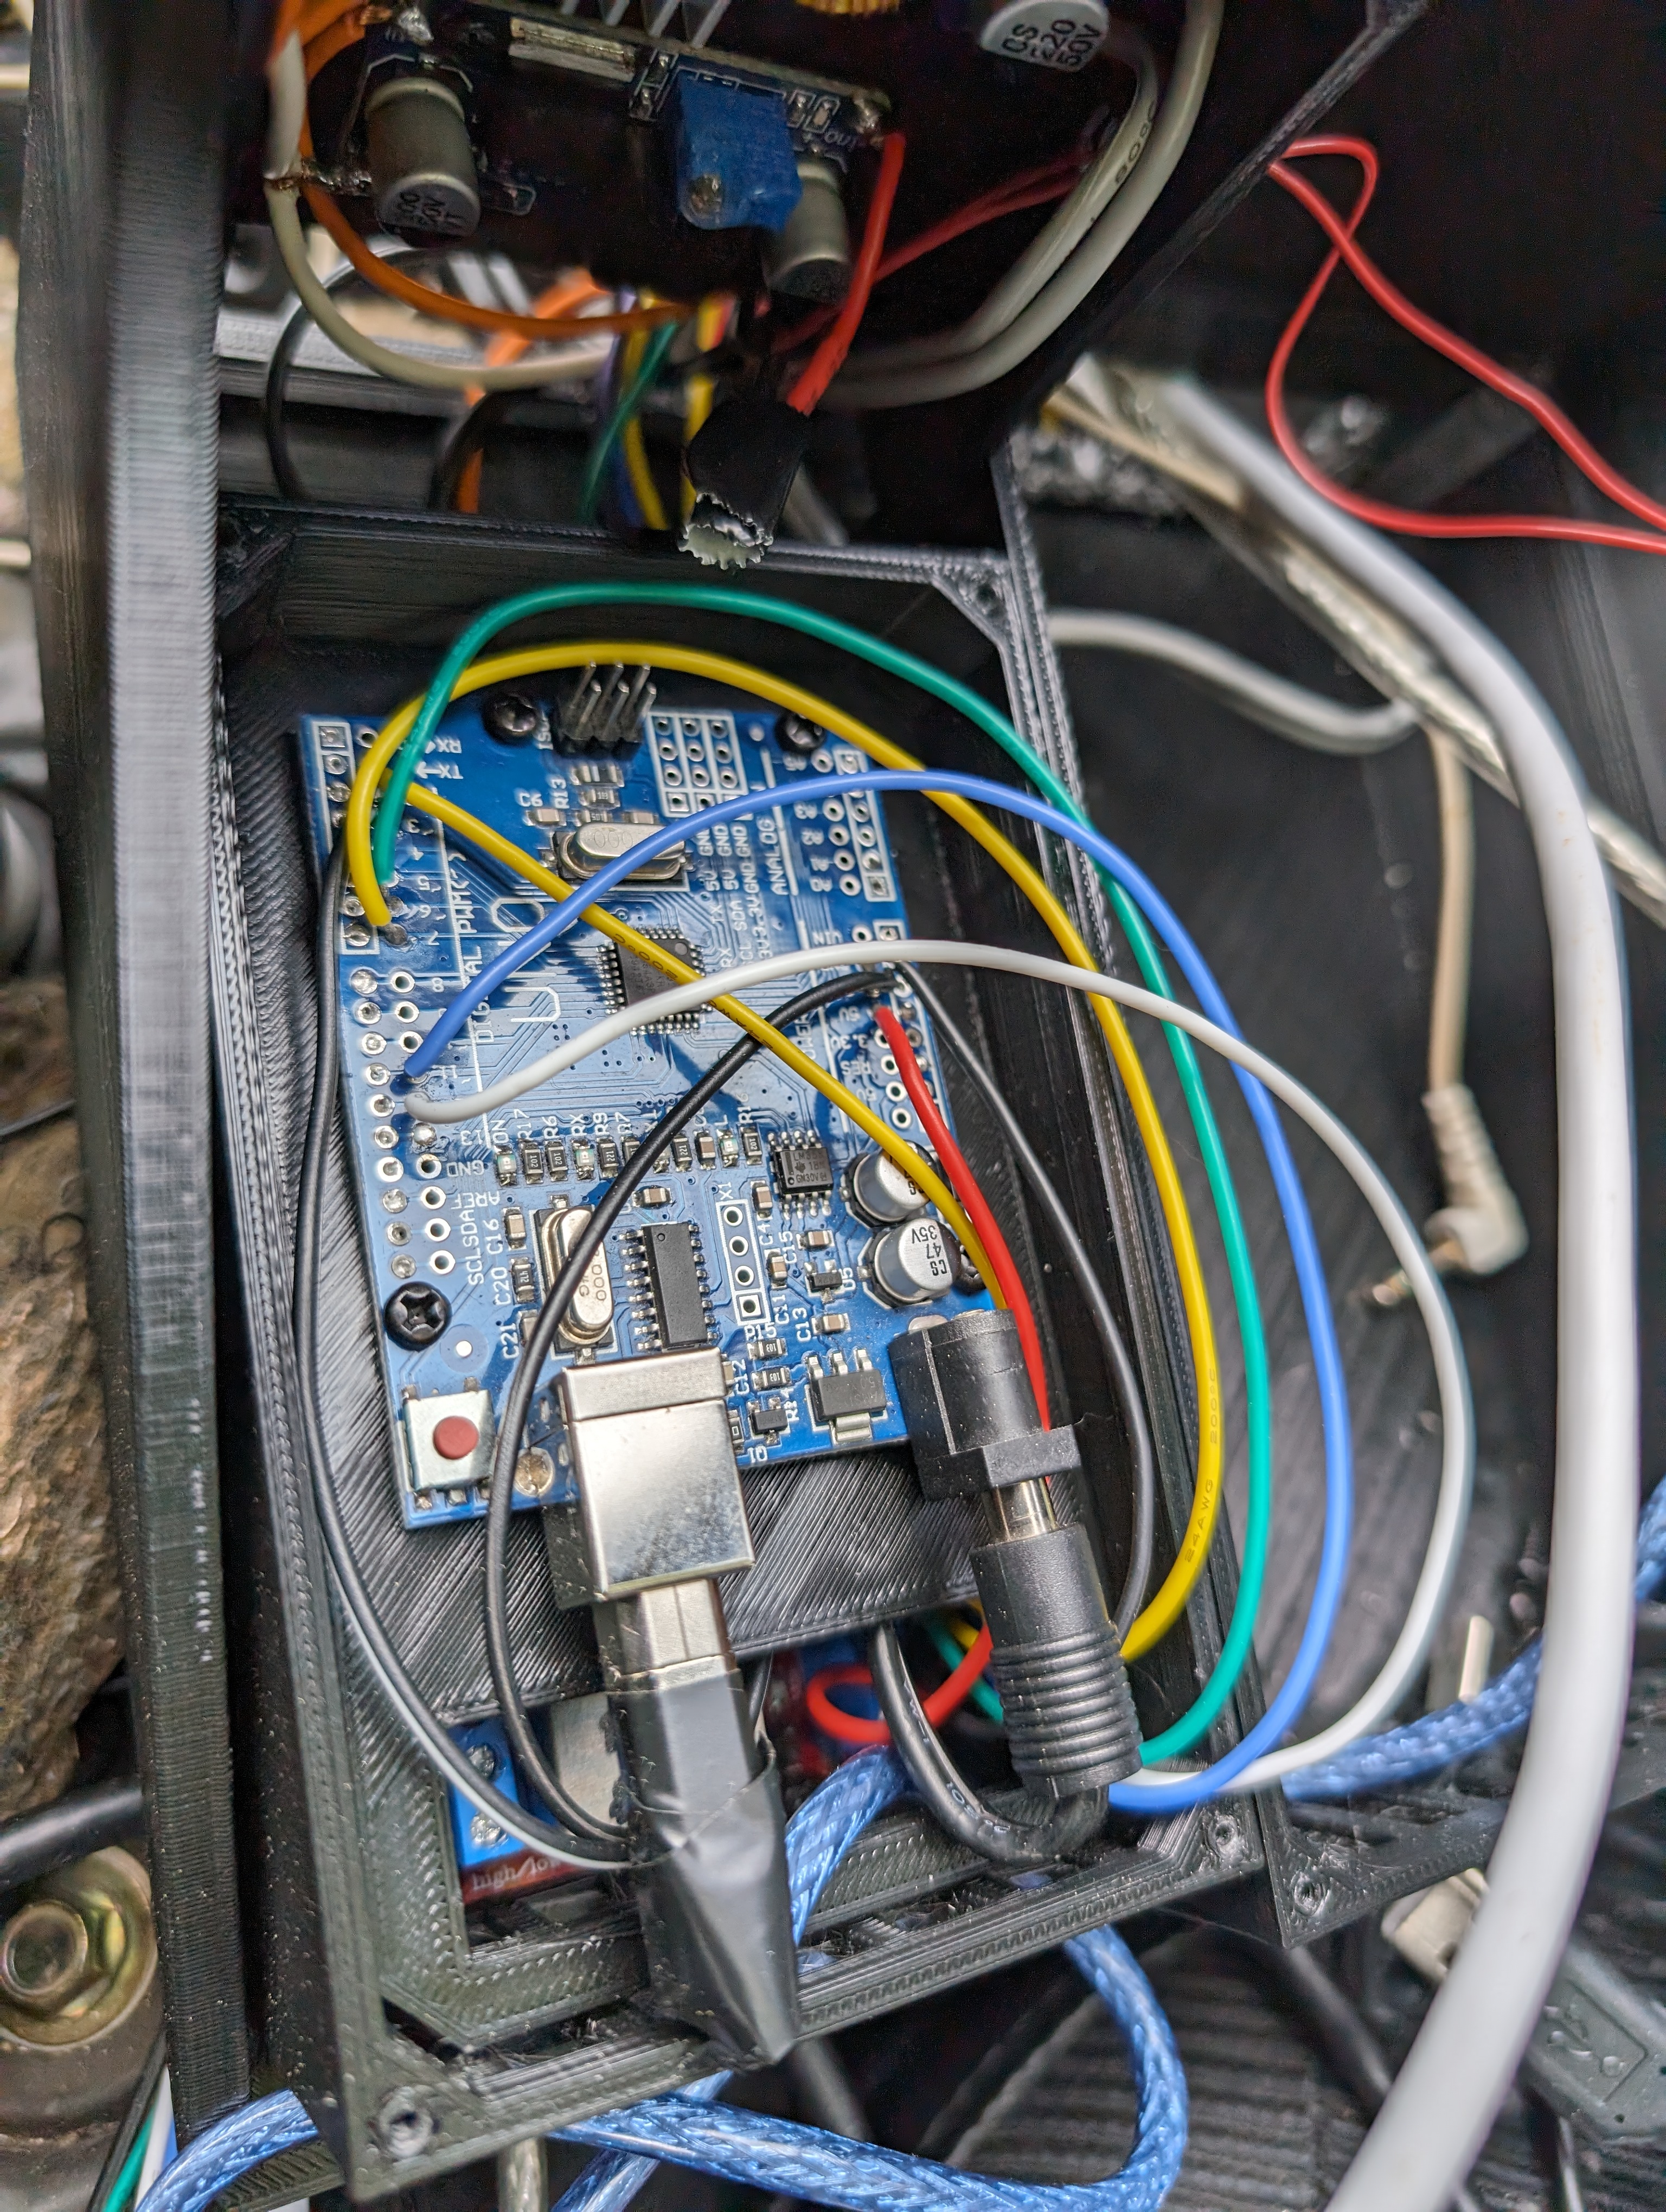
This is what it looks like for me (we will make the case in a later step)


Variables to define
To control the popups over the serial monitor and fix a small issue in the original code this is what we need to do.
These are all the variables we need to define.
TODO: Update example to current Arduino code
#include <EEPROM.h>

#define buttonPin 3  // analog input pin to use as a digital input
#define lightCheckPin 2
#define leftup 11    // digital output pin for left headlight up
#define rightup 6    // digital output pin for right headlight up
#define leftdown 12  // digital output pin for left headlight down
#define rightdown 7  // digital output pin for right headlight down

#define leftStateAddr 0 //EEPROM Addresses
#define rightStateAddr 1
#define valAddr 2

bool ledVal = false;  // state of headlight power

bool waving;

bool lightsOn;

bool lastLightsVal;
bool lastButtonVal;

bool allowModifyingLightsWhileOn = false;
We are using EEPROM to save the state of the light even if the Arduino was powered off completely.
The lightCheckPin is for reading if the light is activated so that the
popups go up if you turn on the light switch.
Set this allowModifyingLightsWhileOn to true if you want to be able to close the popups even if the lights are on.
Setup function
This is the code we need in the setup function.
void setup() {
  Serial.begin(9600);

  pinMode(buttonPin, INPUT);
  pinMode(lightCheckPin, INPUT);
  digitalWrite(buttonPin, HIGH);

  lastButtonVal = digitalRead(buttonPin);

  pinMode(leftup, OUTPUT);
  digitalWrite(leftup, ledVal);

  pinMode(rightup, OUTPUT);
  digitalWrite(rightup, ledVal);

  pinMode(leftdown, OUTPUT);
  digitalWrite(leftdown, ledVal);

  pinMode(rightdown, OUTPUT);
  digitalWrite(rightdown, ledVal);


  ledVal = EEPROM.read(valAddr);
}
The button on buttonPin will toggle the popups. To trigger it, it's pin needs to be connected to ground.
Loop function
This is the code we need in the loop function.
if (checkButton()) {
    toggle();
  }

  lightsOn = checkLights();

  if (Serial.available() > 0) {
    String data = Serial.readStringUntil('\n');

    if (data == "wl") {
      winkLeft();
    }
    else if (data == "wr") {
      winkRight();
    }
    else if (data == "ss") {
      sendStates(); // We need this later so that the GUI displays correct data on startup
    }
    else if (data == "tg") {
      toggle();
    }
    else if (data == "tw") {
      toggleWaveing();
    }
    else if (data == "rs") {
      down();
    }
    else if (data == "am") {
      allowModifyingLightsWhileOn = true;
    }
    else if (data == "dm") {
      allowModifyingLightsWhileOn = false;
    }
  }

  if (waving) {
    wave();
  }
Popups control code
These are all the function that control the popups and relays.
void toggle() {
  stopWaving();

  if(lightsOn){
    Serial.println("el");
    if(!allowModifyingLightsWhileOn)
      return;
  }

  ledVal = !ledVal;
  EEPROM.write(valAddr, ledVal);

  digitalWrite(leftup, ledVal);
  digitalWrite(rightup, ledVal);
  digitalWrite(leftdown, !ledVal);
  digitalWrite(rightdown, !ledVal);

  sendLeftPos(ledVal);
  sendRightPos(ledVal);

  delay(750);

  digitalWrite(leftup, LOW);
  digitalWrite(rightup, LOW);
  digitalWrite(leftdown, LOW);
  digitalWrite(rightdown, LOW);
}
void winkLeft() {
  stopWaving();

  digitalWrite(leftup, !ledVal);
  digitalWrite(leftdown, ledVal);

  sendLeftPos(!ledVal);

  delay(750);

  digitalWrite(leftup, ledVal);
  digitalWrite(leftdown, !ledVal);

  sendLeftPos(ledVal);

  delay(750);

  digitalWrite(leftup, LOW);
  digitalWrite(rightup, LOW);
  digitalWrite(leftdown, LOW);
  digitalWrite(rightdown, LOW);
}
void winkRight() {
  stopWaving();

  digitalWrite(rightup, !ledVal);
  digitalWrite(rightdown, ledVal);

  sendRightPos(!ledVal);

  delay(750);

  digitalWrite(rightup, ledVal);
  digitalWrite(rightdown, !ledVal);

  sendRightPos(ledVal);

  delay(750);

  digitalWrite(leftup, LOW);
  digitalWrite(rightup, LOW);
  digitalWrite(leftdown, LOW);
  digitalWrite(rightdown, LOW);
}
void toggleWaveing() {

  if(lightsOn){
    Serial.println("el"); //`el` stands for "Error lights"
    if(!allowModifyingLightsWhileOn){
      waving = false;
      Serial.println("we");
      return;
    }
  }

  waving = !waving;
  if (waving) {
    Serial.println("ws");
  } else {
    Serial.println("we");
  }
}

void stopWaving() {
  if(waving){
    Serial.println("we");
  }
  waving = false;
}

void wave() {
  if(lightsOn){
    return;
  }

  ledVal = !ledVal;
  EEPROM.write(valAddr, ledVal);

  digitalWrite(leftup, !ledVal);
  digitalWrite(rightup, ledVal);
  digitalWrite(leftdown, ledVal);
  digitalWrite(rightdown, !ledVal);

  sendLeftPos(!ledVal);
  sendRightPos(ledVal);

  delay(750);

  digitalWrite(leftup, LOW);
  digitalWrite(rightup, LOW);
  digitalWrite(leftdown, LOW);
  digitalWrite(rightdown, LOW);
}
el stands for "Error lights" and gets triggered when the light is on, and you try to modify the state of the popups.
void up() {
  stopWaving();

  ledVal = HIGH;
  EEPROM.write(valAddr, ledVal);

  digitalWrite(leftup, ledVal);
  digitalWrite(rightup, ledVal);
  digitalWrite(leftdown, !ledVal);
  digitalWrite(rightdown, !ledVal);

  sendLeftPos(ledVal);
  sendRightPos(ledVal);

  delay(750);

  digitalWrite(leftup, LOW);
  digitalWrite(rightup, LOW);
  digitalWrite(leftdown, LOW);
  digitalWrite(rightdown, LOW);
}

void down() {
  stopWaving();

  if(lightsOn){
    Serial.println("el");
    if(!allowModifyingLightsWhileOn)
      return;
  }

  ledVal = LOW;
  EEPROM.write(valAddr, ledVal);

  digitalWrite(leftup, ledVal);
  digitalWrite(rightup, ledVal);
  digitalWrite(leftdown, !ledVal);
  digitalWrite(rightdown, !ledVal);

  sendLeftPos(ledVal);
  sendRightPos(ledVal);

  delay(750);

  digitalWrite(leftup, LOW);
  digitalWrite(rightup, LOW);
  digitalWrite(leftdown, LOW);
  digitalWrite(rightdown, LOW);
}
Other code
All the other necessary code for everything to work.
void sendRightPos(bool rightUp) {
  EEPROM.write(rightStateAddr, rightUp);

  if (rightUp) {
    Serial.println("ru");
  } else {
    Serial.println("rd");
  }
}

void sendLeftPos(bool leftUp) {
  EEPROM.write(leftStateAddr, leftUp);

  if (leftUp) {
    Serial.println("lu");
  } else {
    Serial.println("ld");
  }
}

void sendStates(){
  bool leftState = EEPROM.read(leftStateAddr);
  bool rightState = EEPROM.read(rightStateAddr);

  if (leftState) {
    Serial.println("lu");
  } else {
    Serial.println("ld");
  }

   if (rightState) {
    Serial.println("ru");
  } else {
    Serial.println("rd");
  }
}
Sends the state of a popup if it changes or if sendStates() is called.
bool checkButton() {
  bool buttonVal = digitalRead(buttonPin);
  if (lastButtonVal != buttonVal) {
    lastButtonVal = buttonVal;
    return true;
  }

  return false;
}

bool checkLights() {
  bool lightsVal = digitalRead(lightCheckPin);

  if (lastLightsVal != lightsVal) {
    lastLightsVal = lightsVal;
    onLightStateChanged(lightsVal);
  }
  return lightsVal;
}

void onLightStateChanged(bool val) {
  if (val) {
    up();
    Serial.println("lie");
  } else {
    Serial.println("lid");
  }
}
If you have all of this code in one file and uploaded it you should be able to control the popups from the serial monitor.
Full code
You can have a look at the full light controller arduino code here: SmartMiata miata-light-controller.ino.